The process for Installing Concrete Curbing.
It all starts with the consumers want or desire to enhance their landscaping. Creative Curbing works with the consumer throughout the entire process to help customers envision and design their dream landscape curb creation!
The first step of the process is for you the consumer to reach out to Creative Curbing regarding your project whether it is via our website estimate form, a phone call, or an email. Once contact has been made, we follow up to discuss the project and address any immediate question or concerns. A key ingredient to the success of the end project is our professionals listening and understanding the customers project objectives and to help them visualize different curbing designs that ensure they fully agree with the expected outcome. This process allows customers to ask any questions they might have regarding various parts of their property and allows Creative Curbing to make recommendations as well as fully understand the project scope so to provide an accurate estimate of project budget.
Once the consideration process has concluded and a decision to install landscape concrete edging is made, we assist you with determining the exact styles and colors for the project. Creative Curbing offers three different styles of landscape curbing: mower style, slant style or 4 x 6 style curb. Customers can also choose from a wide variety of colors and stamps for thier landscape curbing project or make it look like natural stone with our new CARVING technique. Prior to our arrival for installation, we ask that all sprinklers, low voltage lighting and pet fences are marked, sprinklers turned off, and pets are secured to avoid disruption during the installation.
Upon arriving on site, a Creative Curbing professional and the homeowner will walk the property to review the final design and address any remaining questions. While walking the property we will paint lines to distinguish curves and take different measurements to help provide a visual and create the perfect design. Upon completing the walk through the Creative Curbing crew will start removing existing edging and cutting sod just below the sod root line to create the 8”-10” wide trench to make way for the new concrete edging. Since the curbing trench is shallow, properly installed utilities lines are not impacted. To help ensure a solid base beneath the concrete curbing, in most cases the new concrete landscape curbing is not installed on top of where existing edging was. Installing the concrete landscape edging on top of undisturbed ground helps to avoid cracking.
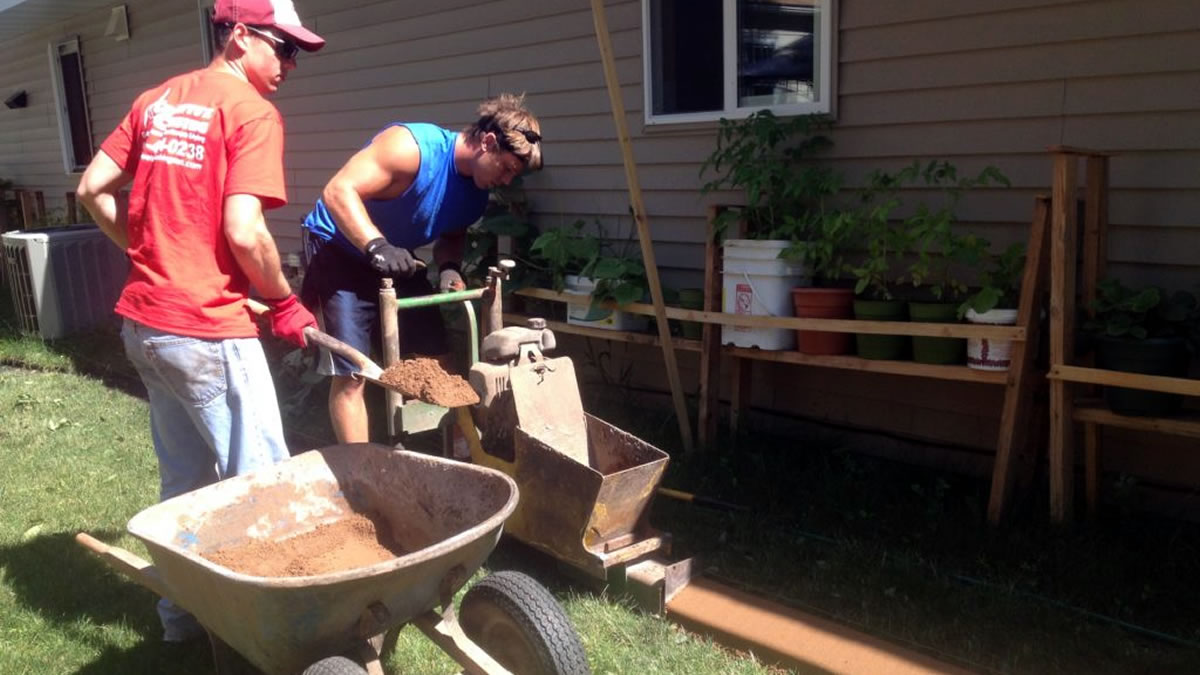
Now that the prep is completed, it’s time to mix and pour concrete. This process starts with crafting the proper mix by using the correct ratios and additives to ensure a quality product. The actual process of putting the concrete landscape curbing down is completed using a landscaping curbing machine specially designed for extruding concrete landscape edging. As the machine lays the concrete landscape edging, our Creative Curbing professionals follow behind to give your concrete landscape edging the finishing touches. This includes the finish troweling, adding color hardeners and releases to achieve the antiquing color look, completing the stamp and texturing process as well as cutting expansion joints. Once all curbing is laid and the crew is beginning the cleanup process, we go back and seal the curbing using a high-quality glossy sealer.
The last step is the final walk through with the homeowner. During this step we visit with the homeowner to make sure that all expectations are met, review all precautions for the next 24-48 hours and discuss long-term care and maintenance.